Using water-based hair system adhesives.
Water-based adhesives are some of, if not the most, popular adhesive choices for hair system wearers and stylists both. From skin gentleness to being easier to apply, water-based adhesives have a little something for everyone to love.
And how water-based adhesives are used can greatly affect how worthwhile these benefits end up being. So, to ensure you get the best possible performance, follow our water-based adhesives usage guide below! Starting with the:
Pros of Water-Based Adhesives
Water-based adhesives come with a lot of benefits, hence why and how they’re becoming as popular as they are. Such as:
- Non-stringy, meaning they’re easier to apply than other options.
- Their color transition from white to clear helps to know when the adhesive’s ready to bond.
- Being easier to cleanup, thanks to the water-base.
- Non-flammable, which helps you save more money on shipping fees.
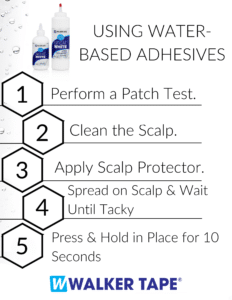
Using Water-Based Adhesives
Step 1: Perform a Patch Test
Each person’s skin is unique and can react differently, even with water-based adhesives.
Simply place a small amount of your water-based adhesive, Great White as an example, on an area of sensitive skin, such as behind the ear. Cover it with a bandage, send the client home, and have them remove the bandage after 24 hours. If no redness or irritation occurs, that means you can use the adhesive with confidence.
Step 2: Clean the Scalp
A clean scalp is pinnacle to getting the ideal bond with water-based adhesives.
Using 99% Alcohol, clean and rid any and all dirt, dust, oils, leftover adhesive, etc. off of the scalp. Once finished, wash the scalp with Bond Breaker Shampoo to get a deeper clean to get the scalp fully ready for bonding.
Step 3: Apply Scalp Protector to the Scalp
A good scalp protector (like our Scalp Protector or Max Hold Sport) helps to keep the scalp safe from irritation, sweat, oils, and more. It also helps to boost the adhesive’s hold by providing a smooth, clean, and protective surface to stick to. This is especially important, since water-bases are water soluble, and sweat can break down that adhesive.
Apply a coat of scalp protector on the scalp after cleaning is finished, and before placing the adhesive.
If using Scalp Protector, wearers must wait at least 24 hours before going swimming, showering, working out, etc. Those using Max Hold Sport can skip those 24 hours.
Step 4: Spread the Adhesive on the Scalp & Let Dry
Once the scalp has been cleansed and primed for bonding, it’s time to apply the water-based adhesive to the skin!
Spread a thin, even layer of your water-based adhesive onto your client’s scalp. Then let the adhesive dry, and apply a second layer onto the scalp – apply if tacky, not dry?. Applying two layers helps to provide a long and secure hold, and prevent an unwanted pillowing effect with the adhesive.
Walker Tape®’s liquid adhesives also turn clear when they’re fully dry, which help to alert when it’s time to apply the second coat, or the unit.
Step 5: Press & Hold in Place for 10 Seconds
Once the system is fully placed onto the scalp, press and hold the unit for at least 10 seconds to activate the adhesive and complete the overall bonding process. Then, let the adhesive sit for at least 24 hours before swimming, showering, or working out (if you used Max Hold Sport as your scalp protector, this part can be skipped).
To find your own water-based adhesives to use, visit our website at WalkerTapeCo.com. If you have any questions or want more information on water-based adhesives, feel free to reach to our Customer Service team at [email protected] or call at 1.800.759.5150. Be sure to follow us on Instagram @WalkerTapeOfficial for more!

The Walker Tape® Marketing Team consists of experienced employees with a wide knowledge of hair systems, tapes, liquid adhesives, hair extensions, and hair replacement products.
The team writes and publishes trusted blogs and other resources designed to help stylists, wearers, and distributors achieve better installs, longer hold times, and more confident results.